Scheduling Setup and Google Calendar Integration

Access your WordPress Profile

To begin, login to the WordPress profile. On this page, you can view basic info about your account, update preferences, and configure consultation appointment availability.

Setup Assigned Products and Baseline Availability

Once on the profile page, scroll to the bottom to find a few important settings for the consulting staff. First is the “Custom Availability” section. This is where an expert can setup the regular hours for which they will be available for consultations. In the example below, I’ve setup a schedule of Monday-Friday, 9:00 AM to 5:00 PM. Feel free to adjust this to your own schedule!

Below the availability, you’ll find “Assigned Products”. This links your WordPress profile to any bookable products. In the case of Agronomy365, there is only one bookable product: Expert Consultation. Ensure that this product in assigned to your profile, otherwise clients won’t be able to book any appointments with you.

Availability Example: MWF Afternoons

Here is an availability schedule consisting of afternoons (2-4 PM) on Mondays, Wednesdays, and Fridays.

Availability Example: Vacation Week

Here is the previous example but with a week of vacation added to ensure no appointments are booked for a given period of time. Note how the “Date range” line (the entry that denotes time out of office) has “Available” set to “No”.

Connect with Google Calendar Integration

Above the “Staff details” section of your profile page, you’ll see a small section labeled “Google Calendar Sync”. If you plan to use Google Calendar to manage your booking appointments (which is recommended), you’ll to connect the Agronomy365 to your Google account. Press the “Connect with Google” button to get started.

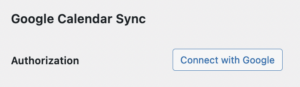
When setting up the integration with Google Calendar, you’ll likely see a warning like the one below. This is due to Google having a manual and somewhat slow process for reviewing and verifying new developer applications. For now, we know what this app is, who wrote it, and the purpose it servers. Under the “Advanced” menu in the bottom left, click the “Go to agronomy365.com” link.
SCHED08_not_verified_trust

Create New Calendar for Appointments

First, navigate to Google Calendar. Find button to “Add other calendars”. Once found, click and select “Create new calendar”. Enter an appropriate name, description, and timezone for the new calendar and click “Create calendar”.

Select New Calendar in WordPress Profile

Back on your WordPress profile page, select the calendar you just created and set the sync preference to “two way”. Be sure to save changes by clicking the “Update Profile” button at the bottom of the page. With this preference set, any busy times added your Google Calendar will be reflected by your availability on the website. Additionally, any bookings made on the site will automatically appear on your calendar.
SCHED13_select_calendar

Example: Setup Busy Time on Calendar

Here’s an example of the first way this “two-way” sync process works. On the calendar, I’ll create a new meeting for which I’ll be busy and not able to schedule any consultations. Once saved, we can switch back to our WordPress profile and check what rules have been synced in from the calendar.
SCHED14_schedule_meeting
There it is! The meeting we just created has been synced to the Agronomy365 website as an unavailable block of time. This means that clients will NOT be able to purchase appointments within this time period. Be sure to add known events to your calendar as soon as possible to avoid any double-booking.

Example: Booked Appointments Appear on Calendar

We can see this confirmed when trying to book an appointment for the busy day: the two hours between 12:00 PM and 2:00 PM are unavailable for booking (left image). Instead, I’ll book an appointment that starts at 2:00 PM. Once booked and paid, the appointment will be visible from our google calendar. We’ll also receive an email informing us that someone booked this slot (right image).

We can also view appointments that have booked within the WordPress’ builtin booking calendar. Clicking on the appointment shows more detailed information about the client who made the purchase: full name, phone number, and email address.

Sync Google and Outlook Calendars

  1. Go to the Outlook Office website.
  2. Sign in.
  3. Setting at the top right hand corner.
  4. View all Outlook Settings.
  5. Select the Calendar Setting.
  6. Click Shared Calendars.
  7. Then Publish a Calendar.
    • Choose which Calendar from Outlook you want to share.
    • Select Permission.
    • Can view all details select.
    • Select Publish. (Click on the ICS link, not the html link.)
  8. Then go to Google Calendar.
  9. Add Other Calendars.
  10. Hit the plus (+) button.
  11. Paste the ICS link into the Google Calendar.
  12. You will need to select to have that Outlook Calendar brought into that Google Calendar. On the lefthand side, you’ll need to select that Outlook Calendar.